Saturday, December 30, 2017

Table Scraps with Island Batik


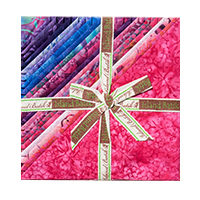
Hi!  I hope you've had a wonderful December, and are ready for the new year.  This is the last Island Batik Ambassador challenge for 2017!  Hopefully not my last.  January is the Blog Hop with the new collections, and I hope I'm accepted again as an Ambassador for 2018.  I'll let you know as soon as I do.  

So, December is #TableScraps.  I had ideas floating in my head all month about what I could make, using some of the scraps from any of the multiple collections I've received over my 5 +years as an Ambassador.  I've even pieced scraps together to make table runners before.  My Zen Basket pattern has a runner from scraps.  So, I looked through my scraps.  I looked through patterns.  Then last week, I purchased some of the new patterns from Quilt In A Day, one of my favorite designers.  So, Friday, I get a package.  It's the order, with 3 new patterns, including Table Scraps.  Yes, the pattern and challenge have the same name.  How can I ignore that??  Kismet!  Fate!  Easy, decision finally made.  So, which scraps to use?  I have sections of the Cherry Berry Collection, pieces left from my Apple Core top. (Yes, still need to finish quilting that, it's on the UFO list for 2018).  
I have enough pieces left from Lake Life, and also from Paisley Dot, the fabric in my newest pattern, Stack Tiles.  
But going back to Table Scraps, I think I need to use lemons, cherries, grapes and that leaves Cherry Berry.  I decided to stick with the theme, lol.  Table Scraps using the Table Scraps pattern made with scraps with food designs.  Yes, corny and goofy, I know, but a girl's gotta find the laughs somewhere. 

So, here's my project!  
Blocks are assembled.
I can't believe how quickly this went together.  I had spent time cutting the squares and background last night, and hoped to get the blocks done tonight.  I ended up spending about 2 hours sewing, and TADA, the table topper is done!  I couldn't believe I had it done that quickly, and that Mom was actually fairly cooperative during that time.  (Before then, not so much, which is why I went up to sew earlier than normal, she was driving me crazy.)
 I do love these colors together, and the background, Moo Milk, offers a great chance for pretty quilting.  I also love the split border look, the blocks go into the border area.  I think I'll use either the other dark purple or one of the multi-color fabrics for binding, when it's done.  I'm thrilled I got this much done before the end of the month.  That was a challenge in itself.  

 Pieced with Aurifil 50wt, the large cone that I was provided as an Aurifil Artisan. I love that it's just always there!  I can thread my machine and not worry about running out.  Not for a long time.

Now, to decide on the quilting design for the pieced block, and find backing.  Which Aurifil thread should I use for the pieced blocks?  Any suggestions?  
 Remember to visit in January for the Four Seasons Blog Hop. 

Thanks so much for visiting, and I hope you visit the other Island Batik Ambassadors for more inspiration.  Enjoy!  And check back for more finishes from me, including this one.

Here's a list of possible links.

Nan from Purrfect Spots Designs
Turid from Den Syende Himmel
Stephanie from Quilt’n Party
Pamela from Pamela Quilts
Anna from Ark Angel Creations
Kathy from Kathy’s Kwilts and More
Jessica from Desert Bloom Quilting
Connie from Freemotion by the River
Kate from Seams Like a Dream
Sharon from Yellow Cat Quilt Designs
Tina from Quilting Affection Designs
Jennifer from The Inquiring Quilter
Barb from Bejeweled Quilts
Sally from Sally’s Quilting Corner
Jeanette from Inch Worm Fabrics
Connie from Kauffman Designs
Joan from Moosestash Quilting
Bernadine from Needle and Foot
Bea from Beaquilter
Cheryl from Cheryl Lynch Quilts
Maryellen from Mary Mack’s Blog
Joyce from Hearts Creations
Marlene from Kissed Quilts
Karen from The Quilt Rambler
Marian from Seams to be Sew
Laura from Slice of Pi Quilts  Linda from Inspired Layers
Vicki from Vicki’s Crafts and Quilting
Nancy from Masterpiece Quilting
Carol from FunThreads Designs
Terri from Meanderings Along Lizard Creek
Alison from Little Bunny Quilts
Suzy from Adventurous Applique and Quilting
Jean-Sophie from Sophie Junction
Janet from Whispers of Yore

Friday, December 29, 2017

A Gift for Father Rudy

Father Rudy Pesongco is a Phillipino priest in our parish for 12 years.  He's been visiting my family for most of that time, once he discovered that our house is across from the closest high school track.  He often stops during his exercise in warmer weather, and takes a moment to chat and rest before walking back the almost mile to the church rectory.  Over the years, he's had a few desserts with us, as well.  He and my dad used to chat.  Dad was a Knights of Columbus, usher, member of St. Vincent de Paul society and overall volunteer at St. Anne's.  When Dad passed away May of 2016, Fr. Rudy was the one who visited him in the hospital, and gave him last rights. 

A few weeks after Dad passed, my brothers came over to choose some of Dad's cuff links and tie tacks, and from his collection of rosary beads and crucifixes.  Among the crucifixes was a reliquary.  I hadn't realized what it was, but after some research, I discovered it's similar to this one.  (photo from youtube, not my father's).
Image result for crucifix reliquary

There was a small screw holding the top and bottom together, and when the crucifix is opened, there are tiny glass pieces with labels that identify the saint the relic is from.  According to the family research, this may have been given to my paternal grandfather, after his near death as a New York City fireman, back in the late 1920s or early 1930s.  He was injured in a building collapse and fire, and since many of Dad's cousins and a few aunts were nuns, it's possible one of them gave this to help my grandfather heal. (Joe actually figured out his own physical therapy and was able to walk again, much to the surprise of his doctors.)  My dad's brother figures this scenario to be the best story of how Dad got this reliquary, after their parents passed. 

As John (my oldest brother) and I discussed, we had hoped to present this reliquary to St. Anne's in Dad's memory.  But unknown to me, on that day, my youngest brother claimed he was "getting the remaining items cleaned at his jeweler" and we haven't seen the reliquary since.  I was really disappointed that a special memorial from Dad, who was such a part of the parish for 64 years, was not presented.  Nothing special was done in Dad's memory, which bothered me.

During this summer, Fr. Rudy started visiting again, and asked about my sewing, and then asked me to do some repairs and alterations for him.  I was happy to help.  He also mentioned that he would be celebrating his 35th year as a priest, with a parish celebration on December 3.  One of the things he asked me to repair and restyle was one of the white albs he wears.  I wanted to make something for him, in Dad's memory, to celebrate his day, so I did some research on albs and fabric, and some discussion with him, and decided to make one.  I happened to have a small bolt of white poplin, and found a pattern in my stash I could use, and added a label to commemorate his jubilee and my dad's memory. 

I was honored he wore this for his celebration mass, and that he loved that the label included my dad in his day. 

Back 
 Front, he wanted an easy zipper closure.

 Label

During the procession.  I LOVE the windows.  The church is beautiful. 
Fr. Rudy celebrating the mass.  

I'm still hoping the reliquary will be returned so we can present it to the church, so others can benefit from the prayers and comfort it can bring.  But at least now there's something at St. Anne's in Dad's memory.  

Thanks for reading.  It's not often I share about non-quilted items I make, and this was a creative use of things I had in my stash.  Dad would be proud of that.  

Maryellen

Thursday, December 28, 2017

#2018PlanningParty

Hi.  I'm linking up with the #2018PlanningParty!

2018 Planning Party

My biggest hope and plan is to actually spend more time sewing.  That time has been missing lately, and I feel crunched because I'm not getting deadline sewing done on time.  Mom's dementia has progressed rather quickly, and she's been more needy, so I'm looking into getting an aide to visit with her (and take some chores off my shoulders) so I have more time to sew (work). 

2.  I want to have at least 3 more patterns submitted for Island Batik.  4 would be better, lol.  I also want to submit to a magazine.

3.  I need to get my studio more organized so I can work more efficiently.  I have a new bookcase to build and hopefully that will clear about 3 bins out of the room, making the space more usable. 

4.  I need to finish some UFOs.  I did fairly well with last year's list.  5 out of 12 were finished, and 3 more had progress.  Other projects were completed, and others, not on the list, had progress, too.  I also did 11/12 of the Island Batik Ambassador challenges.  I have 3 days to do the last one.  If I get the top done, I'll be happy with that. 

5.  I need to confirm my 2018 UFO list, and make sure that some of the "doable" projects get found and put in the pile I grab when I have time.

6.  I want to get the vintage Singer 301 cabinet cleaned and moved into the house (it's in the garage) and get the machine cleaned and working.  I have a spot planned, so need to get that area organized, as well.  It will be fun to have 2 different vintage machines for projects down in the basement apartment. 

I have more quilts to make for my shop, as well, and a few quilts that are in the planning stage.  I just enjoy the process, from beginning to end, and must take the time to work on them.  One is a quilt for my friend's daughter, who is expecting her first child.  I will need to purchase fabric for that one, but most of the others will be from stash. 

That's really most of the sewing plans.  I have other personal goals, as well, but I'm not listing them here.  I keep them more private. 

I need to get more of this listed in my 2018 Quilter's Planner, too.  I have a few projects due within the next 2 weeks, so that's my immediate goal. 

What are you doing?  You can have a chance to win some great prizes if you share your plans with the #2018PlanningParty linky.  Just click on the above photo to get the info. 

Monday, November 20, 2017

Finished Gift

Hi.

I'm so excited.  I love getting things done, and lately, it's not often I get to finish and celebrate it.  I may have mentioned that I'm the caregiver for my mom, who has dementia.  I  live with her, and my sewing studio is above her bedroom.  She hasn't been feeling well over the last few months, and goes to bed early, which means I can't sew.  Well, I can't quilt or cut stuff out.  I can piece tops, using the vintage machine in my bedroom in the basement.  So, things get started, but not much gets finished.  Her memory issues are progressing faster than anticipated, and she needs more companionship, which means I can't go up to sew, unless she's having a good day.  I have to see if I can find someone to come sit with her a few hours a week.

But I digress.  I do want to share a quilt I made for my friend, Christine's daughter.  Megan and Joe were married in April.  I had hoped to get the quilt done for the wedding, but other things had priority, so I did get most of the top done, and then waited because I ordered more fabric for the outer border.

The top was done and pinned, but I didn't have time to quilt it.  I do all my own quilting on my Viking Sapphire 850.  It has nice throat space, and the table I had built for my studio here offers lots of space, so I can quilt large quilts.  This one is a large twin size, mostly because Joe is over 6'2" and I wanted to make a lap quilt they could snuggle under.

I used Lake Life, an older bundle from Island Batik.  Christine was an Island Batik Ambassador, and had quite a bit of this left, so I added the neutral background, and border, and was able to have enough of the colors to make this.  I used the Triple Irish Chain book from Quilt In A Day.   For the main part, I followed the Scrappy version, and for the Seminole border, I followed the planned scrappy.  I didn't have enough of the main cream for the top and bottom of the border, so I was careful how I planned it, using a light sage for the outer pieces.  It was a little bit of a challenge, but I do love thinking and planning.

I used a leaf circle stencil to quilt the 7 cream center blocks, and did a variation of interchained circles or orange peel in the pieced chain blocks.  Instead of hitting every corner, I actually made circles.  I didn't want to over-quilt this because I wanted it snuggly, not stiff.  I used Warm & Natural batting and had a cream floral wide backing for the back.  
For the cream first border, I did a vine chain design.  The Seminole border has the same circle shape as the blocks, and the outer border has feathers.  I used Aurifil 50wt cotton 2325 Linen, my big cone, for the piecing and the quilting of all except the outer border.  I used 50wt in Very Dark Grass Green 2890 for that.  
 My original plan was to use another group's rusty/orange Island Batik for the binding, but when I put it next to the green border, I didn't like it.  So, I pulled all the greens from the original Lake Life bundle, and cut enough strips to make the binding, one from each.  It's basically a scrappy binding, but not as noticeable, because it's close in color to the green border.  The rusty orange was a great match for the pieces in the quilt, but didn't add a nice frame to the green.

Fun fact for Megan and Joe, there are animals in the outer border.  You may find a moose or deer or a mountain cat, if you look carefully.  They are hidden among the forest and water design.

So, I know I've mentioned this before, but being an Island Batik Ambassador is just wonderful.  The fabrics really are the best, and the colors in the collection are always so pretty.  I love working with the fabrics, too, because there is little to no fraying.  Being an Aurifil Artisan is also the best experience.  I've loved Aurifil since I tried my first spool more than 6 years ago.  It's awesome, and the colors are always perfect.  Would you guess that a tan thread did such a good job of "hiding" among all the colors of the chain blocks?  It did.  And the green in the border just blends in, too.  I wanted the fabrics to shine in this.  It's just the way I had hoped, and it's done.  I just need to get together with Christine, Megan and Joe to deliver it.  We're working on that.

Thanks for visiting.

Tuesday, October 24, 2017

Creative Borders and Binding


Hi, and thanks for visiting!  Island Batik Ambassadors were asked to share creative borders and binding.  I have a few items to share.  Get your favorite beverage, this is going to be a long post, lol. 

First, getting creative with borders is actually fairly easy.  I love to play around with borders from printed patterns, and you never know what you can do unless you try.  I often do this, especially if I have more stamps (charm squares) or extra yardage, or even if I'm running low on the yardage and want to make the quilt as large as possible.  I use EQ7 to plan, creating the inside of the quilt with just colors, and adding border options and checking the fabric requirements based on the ideas. 

I've recently designed a quilt that will be at Market with the Island Batik booth.  It's a Christmas Tree Skirt, or could be a lap quilt, and I designed the block in honor of my father, who passed away last year.  I did a Piano Key border, and my pattern will have good directions for making the corner blocks mitered without being mitered, lol.  You'll have to wait for the pattern, lol.  


Consider a Piano Key when you want to add pizzazz and have enough strips or fabric left to cut into strips.  Sew longer strips together, then cut to the desired width of your border, and then join until you have the length you need for the sides.  Much easier than sewing individual rectangles together.  

I'm also working on a Triple Irish Chain quilt, that has a Seminole border.  It's from the Triple Irish Chain book by Quilt In A Day, and will be a wedding gift.  Yes, the wedding has passed, but I'm hoping the quilting will be done by the 6 month anniversary, so I can deliver it.  I have 5 more days, lol.  In this case, the fabrics are Lake Life, a collection from a few years ago.  I had a bundle and didn't have enough for the same cream edge in the Seminole border, so I used the scrappy version in the directions, making sure the creamy one was at the top, and the greener one was at the bottom.  I had the darker green for the outer border. 

 This was a pile of tops I had just pinned/basted for quilting.  

This is before the outer green border was attached.  It really does need it as a frame.  That's another hint about borders or binding.  It's part of the frame of the quilt, so try out a few ideas and fabrics to make sure you're happy with them before you commit to sewing it on.  

My next hint is about making your binding.  DO make sure you sew the strips with a diagonal seam and press the seam allowance open.  It really does help make the seam disappear within the edge.  You'll barely notice the seam allowance, but if you do just straight end to end, you'll feel the bulk.  Also, DO get into the habit of putting all the strips on the same way, so your seams run the same direction.  My first strip is open, but the second one stays folded.  I line the first up with the second, in an L shape (Upside down L, actually) and sew from the top left corner to bottom right corner. My next strip is placed the same way, and I check the fold to make sure the strip is in a flat V shape.  Each seam will go the same direction, then.  My other hint involves the starting section.  Trim that to a 45* angle before you sew it on.  I put my newly sewn strips on my cutting mat, and check the direction of the next seam, using the wrong side.  It's always from bottom left to top right.  I grab my 6" ruler, line the 45* line along the top edge to the end of the strip, and cut off the triangle, from bottom left to top right.  

I then fold this cut end in 1/4 to 1/2", and press, then press the strip in half.  Put this folded end about 8" from your "start sewing" spot.  (Leave the tail for joining the ends later).  


Sew your binding around, as usual, mitering the corners.  Stop about 7-8" from the tail you left before.  Here's my trick.  Tuck the remaining tail inside the folded end, and make sure it's smooth and flat to the top of the quilt.  Pin baste the folded end to the top layer of the inner binding, on top and the bottom to the bottom layer.  


Try to pin just the pressed seam fold line to the inside part of the binding, as if it were sewn along the fold.  Double check the fit.  


Then, carefully open the binding where the pins join it.  It should be an upside down L shape, with the diagonal pressed line hitting the top and bottom edge, and the center fold of the binding making an L, also.  


Adjust the pins so you can sew along the pressed angled line.  Lay it flat on the quilt top again, and make sure it's a good fit.  If so, trim the remaining binding off, leaving about 1/4" allowance, finger-press the seam allowance open, and sew the remaining section to the top.  

No one will guess where you started and stopped, because all the seam angles will be the same. and you didn't need a specialty ruler or trick to finish the seam, just a little prep before and some pins during.  

Did you happen to notice the flange border on that top?  It's another Island Batik challenge piece I recently finished.  I chose to add the dark blue flange because I wanted a separate line between the blocks and border, since I was using the same red fabric.  I didn't want it bigger, just an accent, and wanted the extra frame.  Notice how it's along the red, not the blocks.  It adds a little extra oomph to the red, don't you think?  I cut the strips 1 1/2" wide, and pressed them in half (wrong sides together.  Oh, wait, batiks don't really have a wrong side, lol)  I pressed it to the red border.  In this case, I didn't add quilting to the red, just the blocks and outer border. I wanted the flange to just hang out.  There are other quilts where I just quilt over the flange.  

Now, my final hint has to do with strange angles.  Every once in a while you'll find a pattern that has a different angle, not a 90* corner.  How do you handle that?  Well, in my research, I found this video, and since I think her explanation is perfect, I'm sharing it.  I think if there's someone who explains it well, or the design is already out there, I'll let them tell it, and save my breath.  Why copy when there's someone else who already has it done?  Marci Baker of Alicia's Attic has this great video.  


Here are 2 recent finishes that needed special binding angles.  I refer to this video often, and have it saved as a link on my "Best Quilting Practices" Pinterest page.  


So, that's a lot of information!  I didn't realize my main focus this month for this challenge would be just sharing information.  I actually didn't have to make anything special, because I had creative borders and binding with my other projects.  I kind of feel I got off easy, lol.  
Some of the other Island Batik Ambassadors have shared really creative NEW projects.  I hope you find the links on the Island Batik Facebook page.  If not there'll be a wrap-up post that I'll share later.  Some of the projects are GORGEOUS and you really need to see them.  

Thanks for visiting, and don't be afraid to try something new.  Let me know if you try my binding hint, too, or if you have any questions.  I may be able to post a video about binding soon.  Have a great time finishing your quilts! 

Maryellen


Monday, October 2, 2017

Christmas Carol Row Along

Christmas Caroling RAL 2017 photo CCLogo-2-small-450x373_zps857lafcy.jpg
Hi, and welcome to my day on the Christmas Caroling Row Along!  I'm delighted to share with you today, and so happy that Marian at Seams to be Sew invited me to participate.  She's done an awesome job with this hop, and the wonderful prizes are all because of her work.  She also arranged with Northcott to provide us with fabrics to feature in our rows.  


My fabrics are from Northcott.
9020-91 Silver Toscana for the bell applique
 9020-91
from Silent Night, 21659-44 blue snowflake
21659-44
21660-42 light blue dot
21660-42


21610-10 white snowflake for background.
21661-10
Please look for these fabrics in your favorite shops!  

I LOVE Carol of the Bells.  When I was in high school and college, I was an alto in the Glee Club.  I loved singing the Ding Dong parts, and sounding like the bells.  So, here's my row to go with this song.  


"Hark, how the bells, sweet silver bells, all seem to say, 'Throw cares away.'"

I probably should have chosen a slightly darker shade for the silver bells, but in person, it shows up better.  I may just quilt this as a table runner, or I may add a few more rows or borders.  I wanted the side blocks to inspire thoughts of snowflakes.  

My pattern directions and templates can be found in my Craftsy shop.  This will be free for 1 week, until Oct. 10.  After that, there will be a small fee.  

Now, for the prizes!  Moda fabrics have generously donated a Red Dot Green Dash Fat Quarter bundle by Me and My Sister Designs.  Click on the Rafflecopter widget below to enter that one.  Winner will pay shipping charges.  


a Rafflecopter giveaway

Calibre Arts is offering a discount on a 12 by 18" mat.  I have one of the mats, and it's really nice.  Please enter to win the discount code on this Rafflecopter widget.  You'll purchase the mat with the code, using Amazon.


a Rafflecopter giveaway

And there's also fabric from Northcott! You can win a 2 yard assortment of Fat Quarters.

a Rafflecopter giveaway

Please!  Check with Marian at Seams to Be Sew for details and rules about the prizes.

And check out the other designers hopping today!

Tuesday, October 3, 2017
MaryMack’s Blog You are here!  Thanks!
Kathys Kwilts and More
Pamela Quilts
Duck Creek Mountain Quilting
Heleen Pinkster

Thanks for visiting, and I hope you enjoy using my row.  There's one more day to hop, and then a show and tell day next week.  You can find some of the past rows and more info on Marian's posts!

Sunday, September 24, 2017

Island Batik Back To School Hop and Give-away!

Hi, and welcome back to school.  Today's my day on the Island Batik Ambassador hop, and I'm pleased to introduce you to some wonderful new fabrics, the collection called Cherry Berry.

Click on Cherry Berry to see the fabrics.  I'll wait while you ooh and aah over the colors and designs. Did you see the cute kitchen tools, and all the fruit prints, and that gorgeous pink with grapes and leaves?  No?  Go look again.  Yes, there are even polka dots.  So, go call your favorite fabric store and tell the you need Cherry Berry now.  It's shipping as you read.  I'll wait...

Are you back??
I love going back to school!  I loved being a student, and loved being a teacher.  I've taught all levels, from kindergarten to college (yes, I have friends who still call me Professor). and love getting new pencils, crayons, and folders.  I loved that line in "You've Got Mail" when Meg's character says she wants a bouquet of newly sharpened pencils.  All those years as a teacher, I also loved getting apples, and collecting apples and also going apple picking.  So, I chose to use the Accuquilt GO! Apple core die and make something with all the fabrics in this collection.  Bright and fun and scrappy.  

The die comes with directions for a basic 41 by 50" quilt, and there's a tutorial on the Moda Bake Shop  that measures 51 by 57.  I think I cut out about 140 pieces, planning to do 11 by 15 rows, and picked randomly from the pile.  I did try to not have the same colors or fabrics touching, but with scrappy, it doesn't matter as much.  My collection included 20 SKUs, plus 2 more for border and binding.  I'm not sure if I'll add a border to this, or just cut the edges straight, or use a bias binding and keep it curvy.  That part of the quilt isn't talking yet, lol.  I've named it Apples From the Teacher. 

But as a teacher, I always need to include my version, my directions, and how I did it.  I'm not big on pinning, except when adding gathered things or sleeves, or long seams.  I've been sewing since I was little, and got my first (hand-me down from mom) full size machine when I was 7.  (Ahem, more than 45 years ago).  I made clothes and doll dresses, and worked with tons of curved pieces.  I think it's really funny when someone says you need to pin something every centimeter or less.  That's really not necessary.  I've also done tons of Accuquilt curved shapes, like the Drunkard's Path, and recently, the Double Wedding Ring.

Here's my lesson: Limit the pins, use a stiletto or your fingernail to help make sure the edges line up. You may want to pin the beginning, the place where the notches line up, and the end.  Or not.  Just go slow, and use a good seam guide.  I recorded a video of me sewing on my vintage Singer 15-91, so you can see it works.  If you're using a more modern machine, just adjust the speed so you have the most control, and use a good 1/4" guide. Please notice I use my right hand to guide the fabric on the bottom, and left to guide fabric on the top.  I adjust as it goes through the machine.  

Here's the video.


Here's a few photos of my top so far.  Life happens while deadlines loom, so I don't have this quilted, and may still add a few rows.  I do love nice size lap quilts, and this one is just so fun and pretty.


So, I'll let you know when this is done.  I do occasionally finish something, lol.  

So, thanks for visiting for the Island Batik Back to School Hop.

Island Batik has a give-away using Rafflecopter.  


The other Island Batik Ambassadors have more to share and to give away.

WEEK 1
Tuesday, September 5 – Country Dozen
Cheryl Lynch Quilts • Inspired Layers
Wednesday, September 6 – Bonsai
Little Bunny Quilts
Thursday, September 7 – Sakura
Masterpiece Quilting

WEEK 2

Monday, September 11 – Fresh Pick’ins
KISSed Quilts
Tuesday, September 12 – Lotus Blooms
Kathys Kwilts and More
Thursday, September 14 – Rise & Shine
Den Syende Himmel • Sally’s Quilting Corner
Friday, September 15 – Diner Days
Ark Angel Creations • The Quilt Rambler

WEEK 3

Monday, September 18 – Seas the Day
KISSed Quilts • Whispers of Yore • Needle & Foot
Tuesday, September 19 – Vineyard
The Inquiring Quilter • Inchworm Fabrics
Wednesday, September 20 – Abalone
PamelaQuilts • Yellow Cat Quilts
Friday, September 22 – Captain’s Anchor
Purrfect Spots Designs • Beaquilter

WEEK 4

Tuesday, September 26 – Lobster Bake
Seams to be Sew
Wednesday, September 27 – Solstice
Bejeweled Quilts • heARTs Creations
Thursday, September 28 – Sour Apple
Seams Like a Dream • Kauffman Designs
Friday, September 29 – Zen
Lizard Creek Quilting • Quilt’n Party
And I have something, too.  I'll be sending a lucky comment writer a sweet little something.  I have a really hard time picking to give my gorgeous Island Batik away, but you'll be happy with a small prize.  It may be strips or a charm pack or some FQs or some 5" rolls, and a copy of my first published pattern, featuring Zen, which you'll see later this week.  You'll have to wait and see.  So, I do hope you're following my blog, either by email or bloglovin, and you also follow my Facebook page.  Let me know and you may be my lucky winner.  This will close Saturday, Sept 30 at midnight. NY time.  
Please also share this with your friends!  Thanks for visiting, and go find some Cherry Berry and some apples for the teacher.