

Welcome to my day on the Tool Talk Blog Hop!
Have I mentioned I love being an Ambassador? Island Batik is so generous with their collections for the hops, and I am able to make gorgeous large quilts. The Ambassadors received 1/2 yard cuts of all 20 different SKUs in the collection, as well as 2 yards each of a dark and a light coordinate. We also got a new tool from Studio 180* and Deb Tucker. I'm working with the Wedge Star tool, and Midnight Glow from Island Batik. This collection should be shipping to stores this month, so now is a great time to look for it. If you can't find it, let your shop know you want it.


Midnight Glow is so pretty. The lightest tan color is called Wicker, and the darkest blue is called Storm. I got both of these as coordinates, so Wicker became the background, and Storm is the border and accent blocks in my design. The colors are prettier in person.
I LOVE that Studio 180 tools have multiple sizes on each tool, so you can really play with the size of the blocks used in the quilt. Want to make a 9" block larger?? Just follow the chart to take your pattern's instructions to the new size. The Wedge Star tool has instructions for 3 different blocks, plus a whole ton of different combinations you can make, and Deb has produced a number of videos to go along with using the tool, as well as specialty Technique Sheets to make the Diamond 4 Patch and Twisted Wedge versions I tried. The sheets are provided to the Ambassadors so I planned to use them.
I started playing on EQ8 and decided I also wanted to play with the size of the blocks. So, the center star is a 24" block. Perfect to show some of the colors of Midnight Glow. Doing the math, I created a 12" row of blocks surrounding it as a "border". Then, I made an 8" border of blocks, before adding the final 6" border, so I ended up with a quilt that's about 76" square.
I shared some teaser blocks on Instagram and Facebook, and my cousin mentioned she had no clue how I was going to get these different size blocks into a top. Well, I added a few others. That's how, lol.

To learn how the tool works, I made 4 8" blocks first. These became the outer corners. I added more 8" Wedge blocks, as well as half square triangle blocks, which were made 8 at a time, and trimmed with the Tucker Trimmer. I also cut 8 Wicker fabric squares for this border.
Next, I wanted to get the big 24" block done.

This is before adding the corners. The colors were fun to play with. I used a dark teal with a gorgeous plum purple, and the deeper gold to really make this glow.
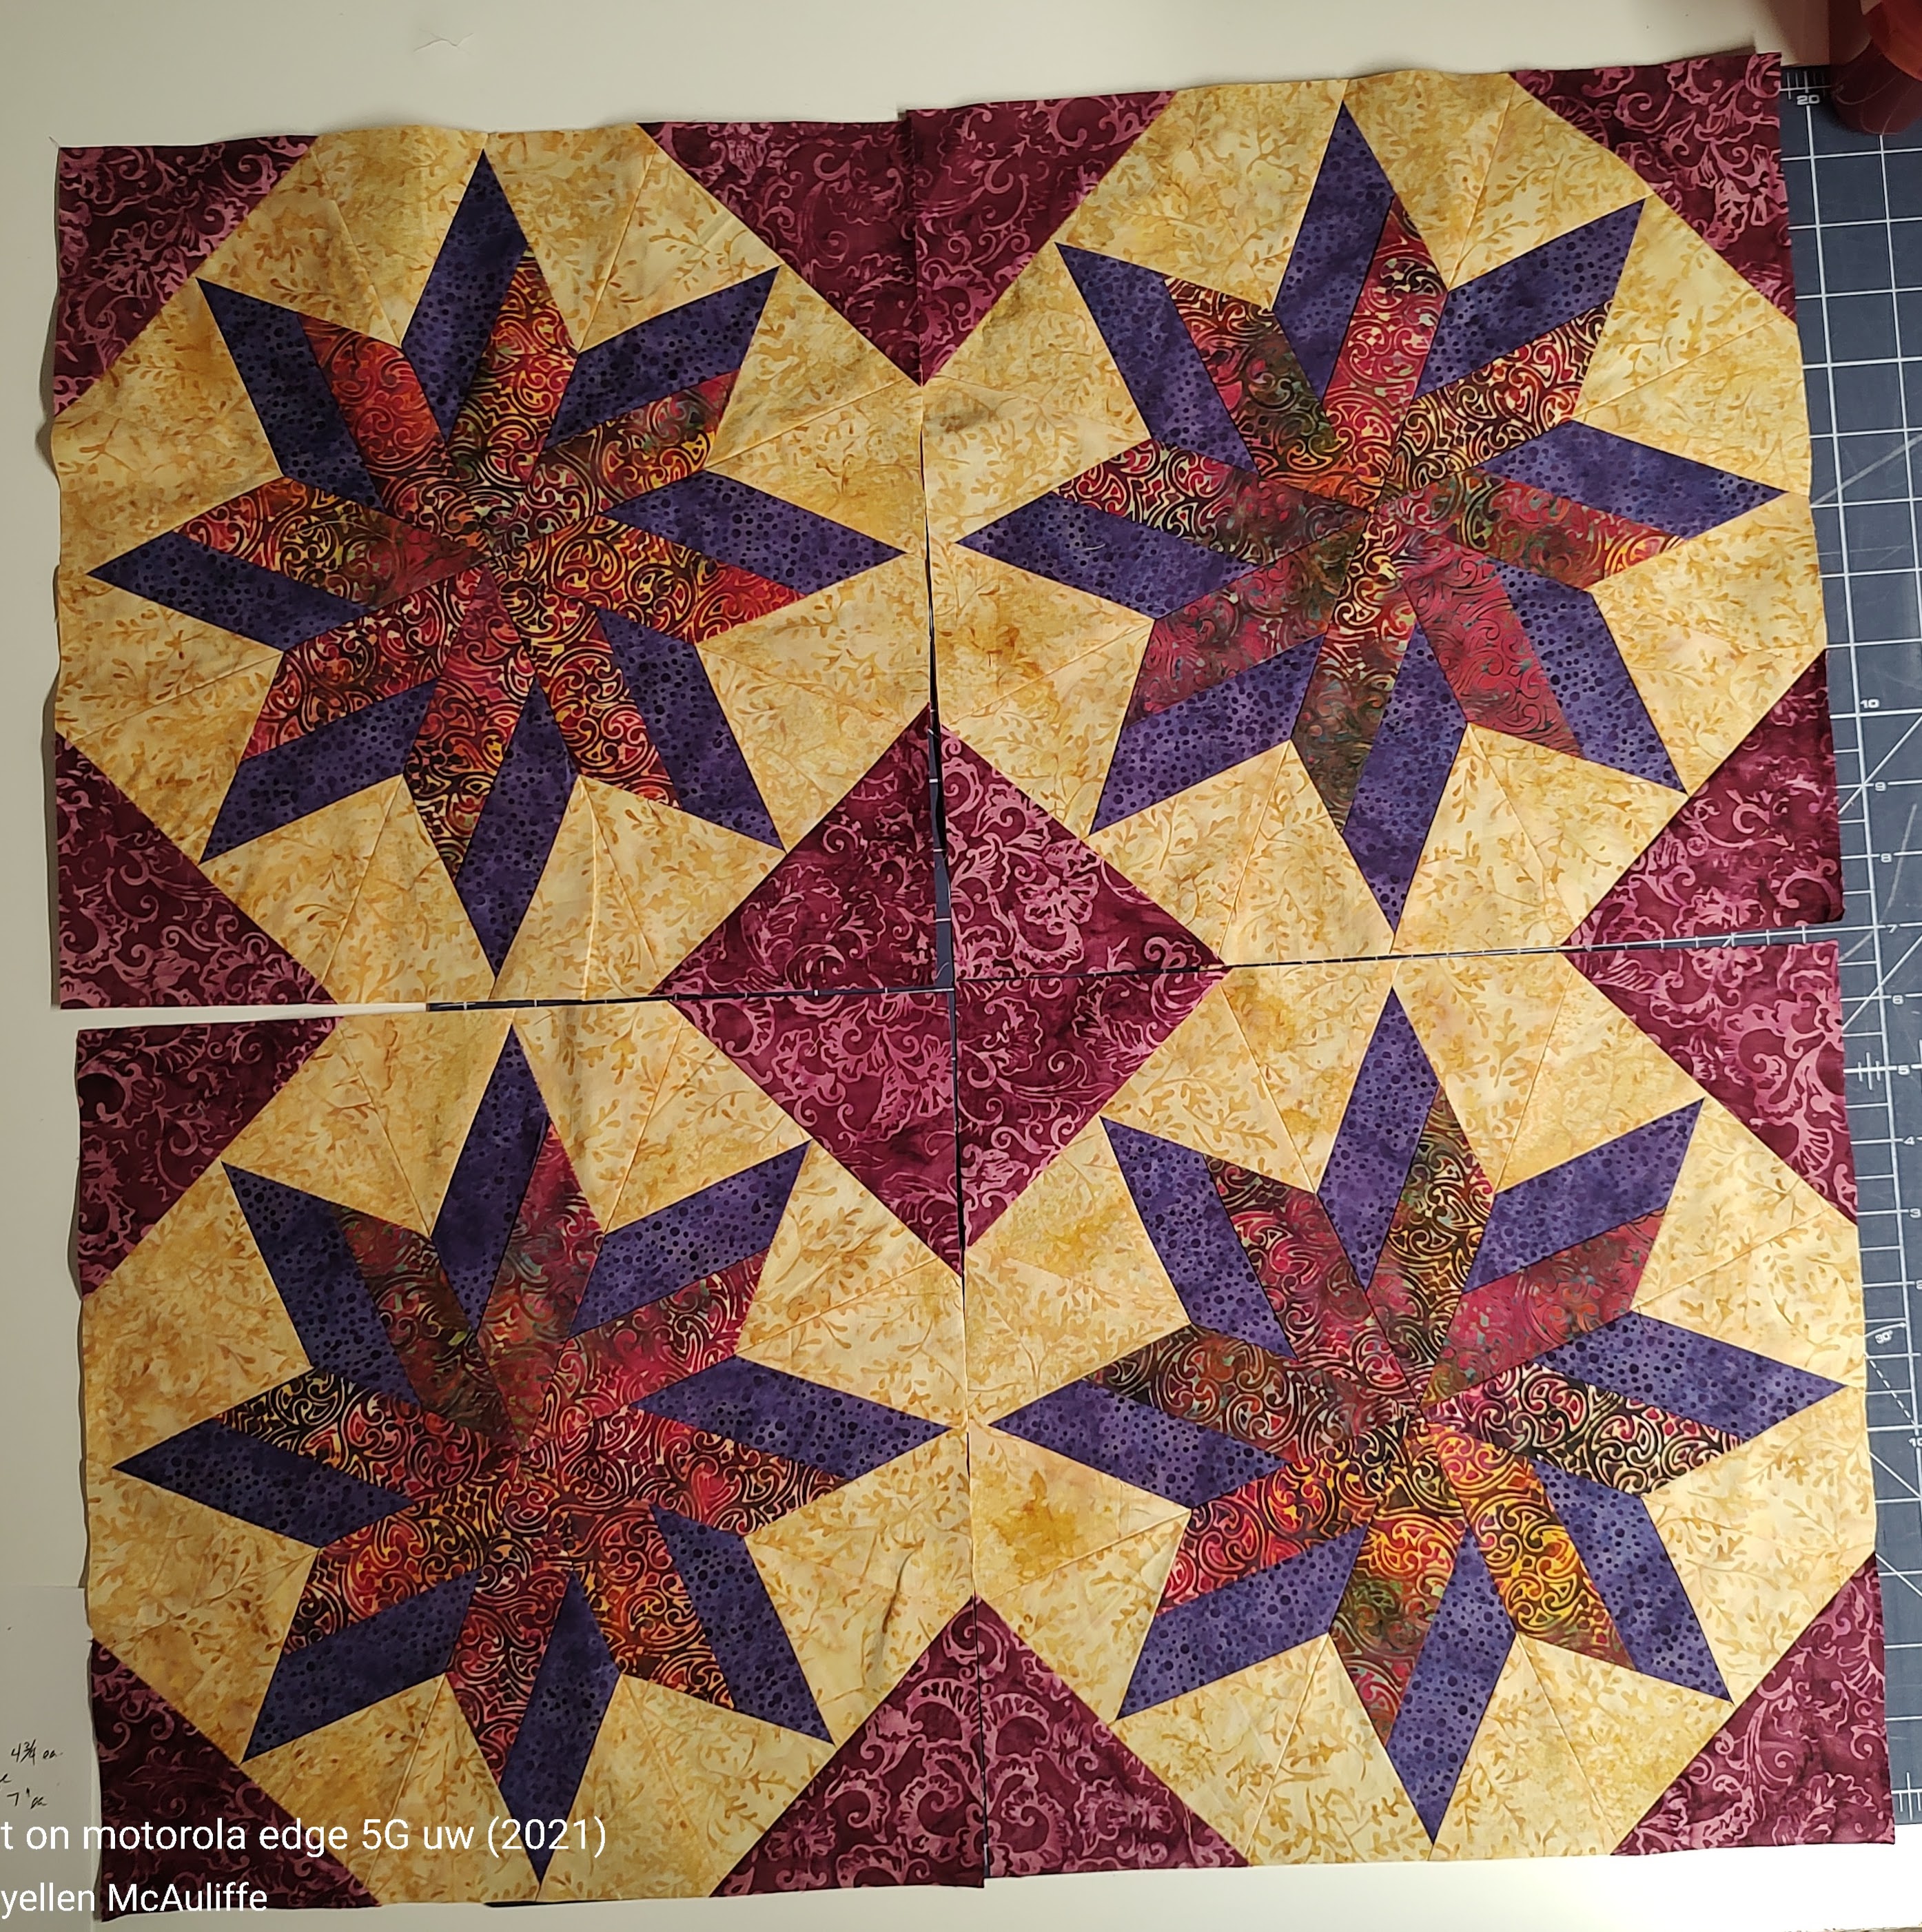
I picked more colors to make these Twisted stars, and used a total of 15 different fabrics in this top. I didn't get to use 2 of the lighter plum colors, and set aside the brighter red, as well. There were other tan fabrics, too, which I felt were too close to the background, and I didn't need them, since I had the 2 yards of Wicker. I do plan to give away some of these as well as some larger scraps, so check below for details.
It was fun to choose the multi-colored prints for some units, as they added depth to the design. The similar blocks all use the same fabrics, it's the fabric color that changes, not the unit. You can see this in the wedge blocks.
Although I had set the actual fabrics in place in EQ8, I changed them when I was picking the pieces for the blocks. Using the plan is a good starting point, but it's fun to change things up, as well.
Are you ready to see the whole top?

Heather thinks it's really pretty, and thinks it looks really good with her coloring. She got very comfortable as soon as she saw it on the chair.
Okay, enough teasing. here's the top.


Center Diamond 4 patch, with the setting Wedge squares, and the Twisted in each corner.

A closer view of the Twisted, along with more Wedge blocks and the Wedge Star in the corner.

I added the HST blue/wicker blocks to help accentuate the center star. I also liked how the different blocks didn't actually "match" at the edges, so the center block has a very dynamic shape.
Of course, I used Aurifil 50wt for piecing, and a new Schmetz size 12 needle. It's the perfect combination for great blocks. Another thing?? The new Prairie Spirit Alpaca pressing mat made my seams super flat. 


a Rafflecopter giveaway

The seam toward the front was pressed with the same iron as the seam in the middle. The front and back seams were pressed on the Alpaca mat, and the middle one was just pressed on my ironing board. No steam was used. Do you see how much closer to the block the front seam is from the middle? To get even better results, I also use a wood clapper (just behind the block in this photo) my good friend Jeremy from Dietrick's made for me. I'm trying to see if he'll make more, lol.
So, using the best tools makes a huge difference in the quilt blocks. I was actually surprised at how good my seams matched. Without really trying, I had some perfect points and match sections. I try to get close most of the time, and will take out something if it's really off, but this time? It was pretty easy to get almost perfect blocks. See the Diamond 4 patch wedges below? That inner point is perfect, and by the way, NOT a Y seam.
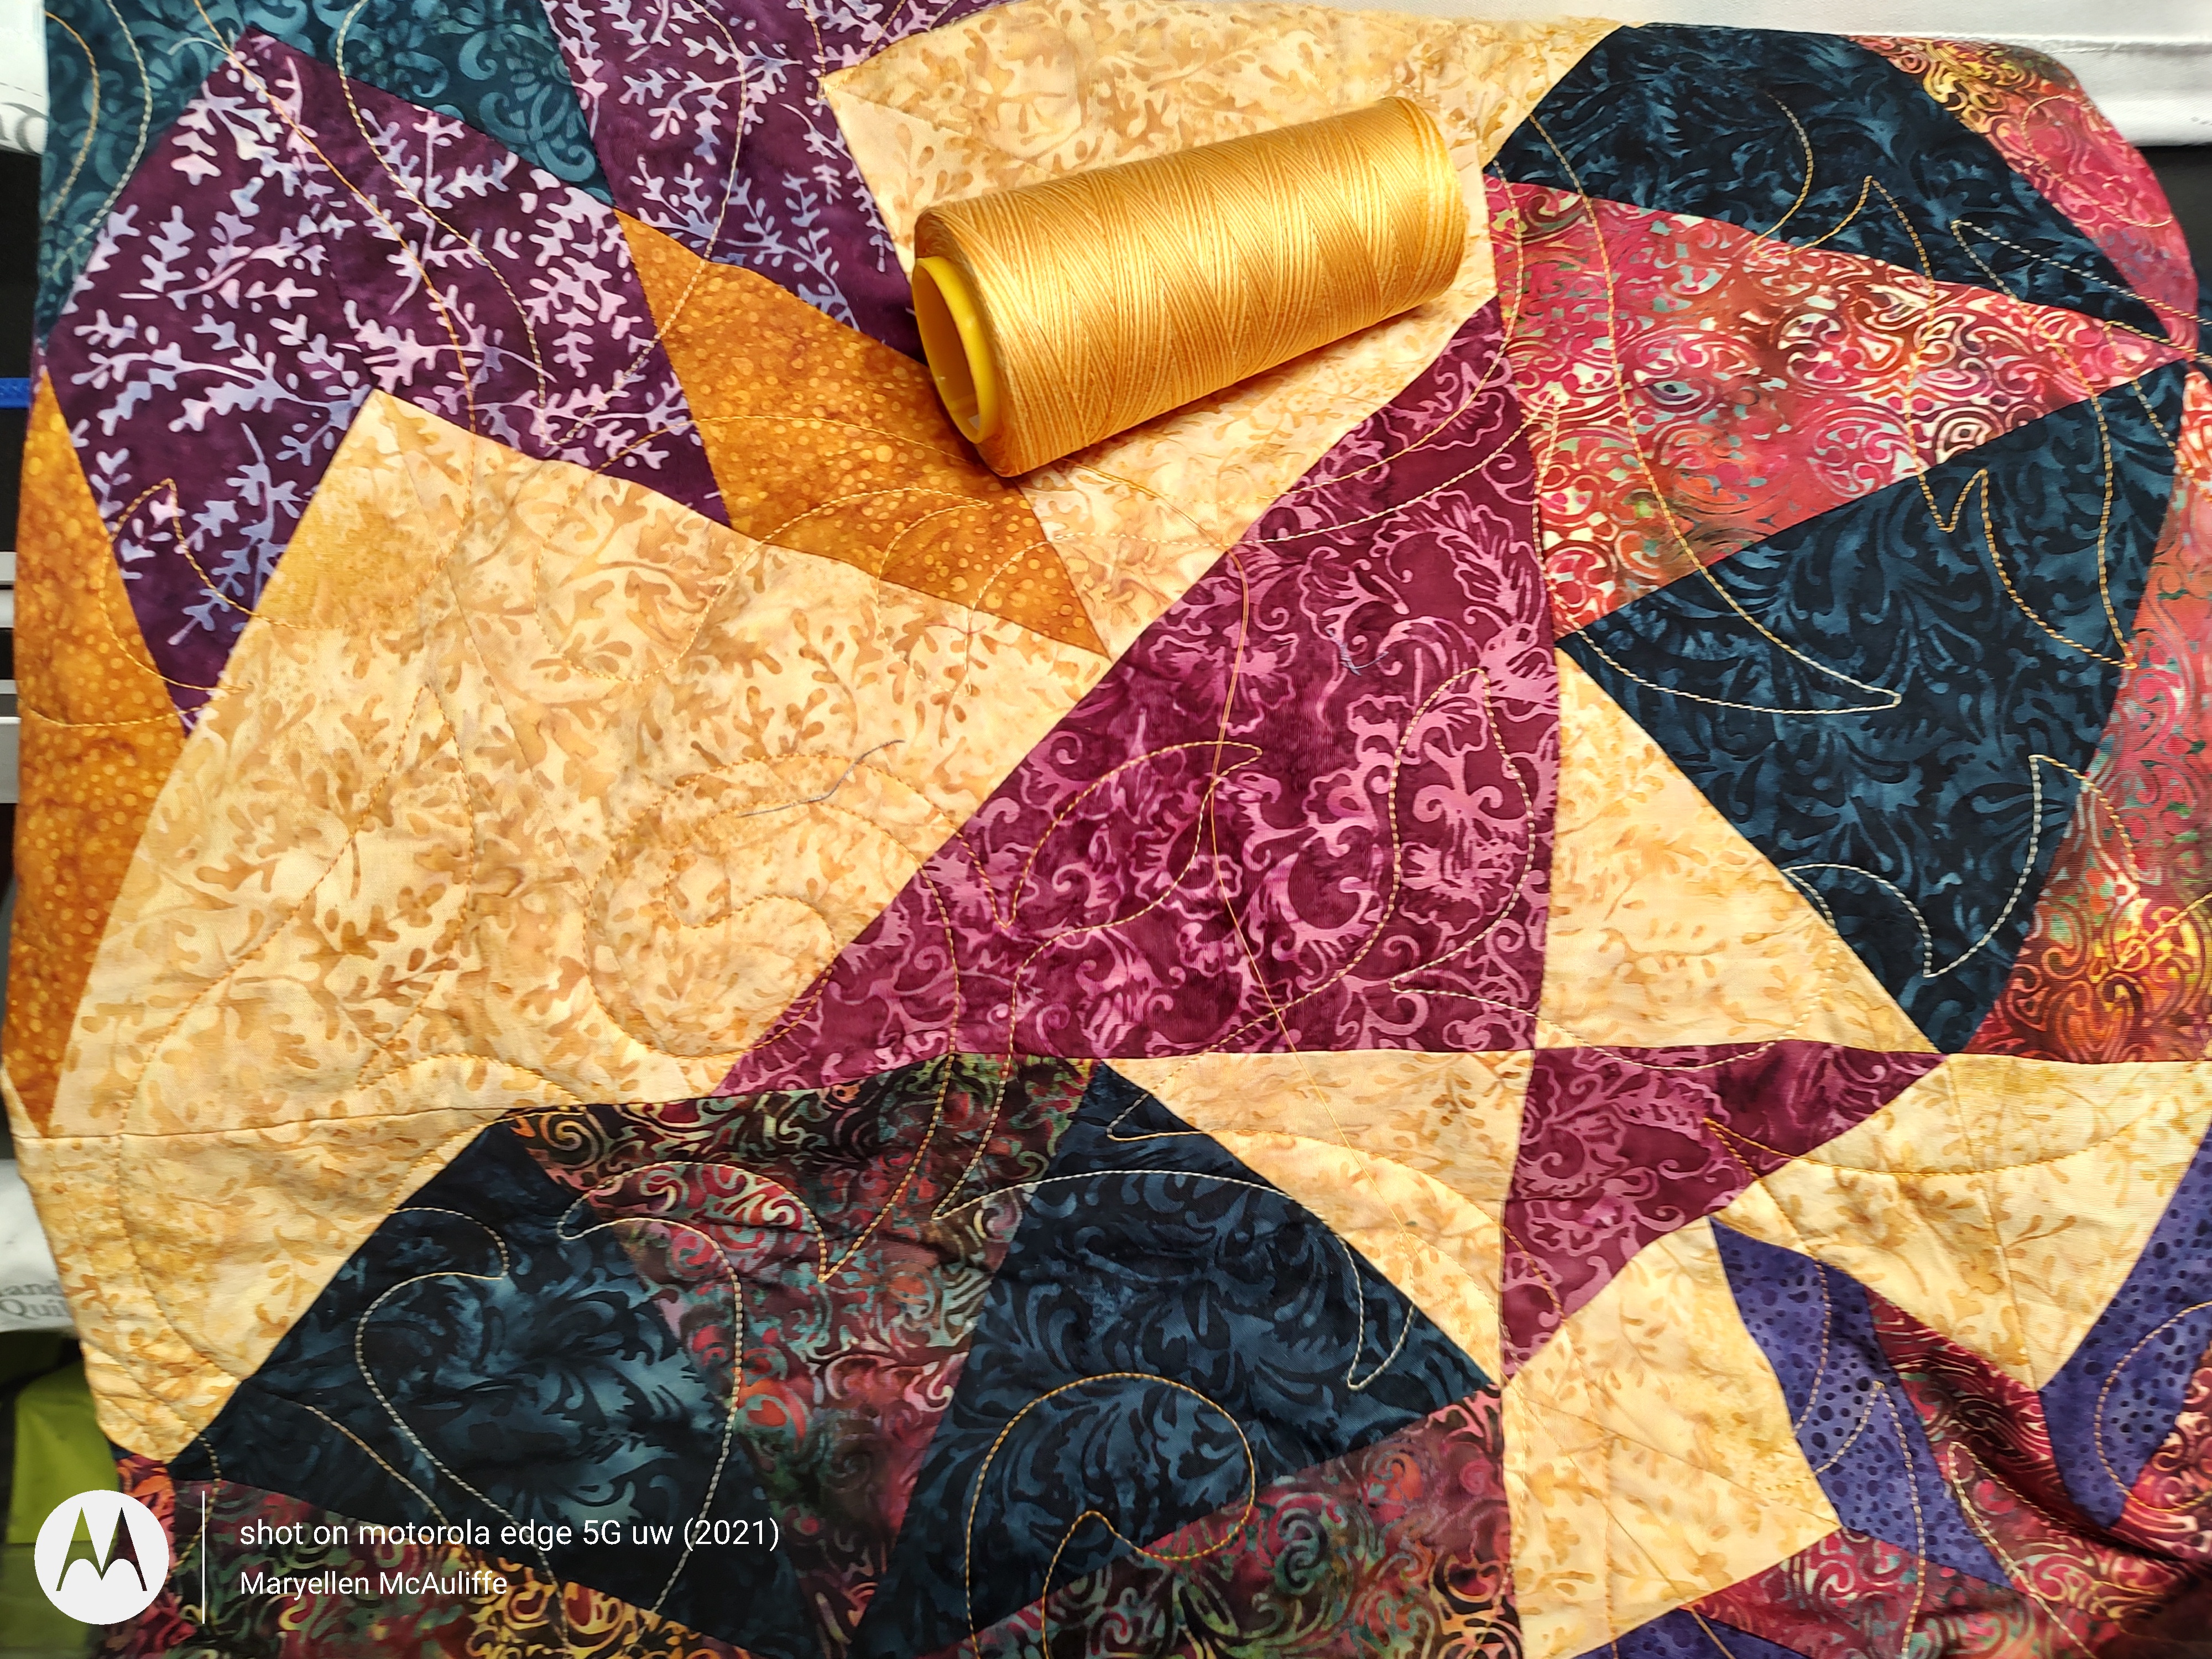
I loaded the top on my Handi-Quilter Amara with Pro-Stitcher, and used Aurifil Forty-3 for quilting. I used color 4150, Creme Brule, a variegated gold color, and Anne Bright's Florence pantograph. I felt the Florence had similar leaf and scroll designs to the tjaps in the fabric, and using the gold, even against the Storm border, would add another layer of elegance to the top. Backing is a wide back from my shop.

The binding was sewn on by machine, with Aurifil 50wt 2784, Dark Navy, which is a great match to the border and binding.

So, I hope I've convinced you to try Studio 180 tools, especially the Wedge Star, and to look for Midnight Glow in your favorite shop.
Island Batik is sponsoring a give away, so please click on the Rafflecopter link to enter.
Then, please also check out Megan Best's blog for her gorgeous quilt using Midnight Glow, and her tool from Studio 180.
Have you been following the blog hop? Please check out the other Ambassador's projects. The links for each collection are on the Island Batik blog.
Please leave a comment below if you've ever used a Studio 180 tool and I'll pick one comment to win some fabric from this collection. If NON-USA, please let me know if you're willing to pay the additional difference in shipping if you win. I'll make sure the flat rate envelope is stuffed. I'll use Random.org to pick someone when the hop is over.
Thanks again for stopping by to see my quilt. Please remember to check out last week's inspiration, and look for a new give-away from Island Batik Friday, for next week's Ambassadors.
Maryellen