Have you seen some of the fun Celebrations challenge pieces from the Island Batik Ambassadors? So far, there's a really cute and personalized Christmas tree skirt, a great blue quilt for Solstice, and other fun projects. It's always fun to see what the others choose to make when we have a little more freedom to create something. The suggestion was to celebrate any holiday, and any size. For my project, I have 3 possible ideas, but one is done. My Sister-in-law's twin, E, asked me to make her 2 table toppers. I've done some before, but she didn't have Autumn, or Christmas. She has a smaller table, so likes the octagon shape, but gives me creative license for the fabric, and what I choose to do for the center. I love customers like that. I also love that it fits with this challenge. I was in a red and green mood, so did the Christmas one.
For the project, I used the Pieced Tree pattern, a little laminated card, called Center Stage. It's the size E likes, as well as a cute, easy pattern, and I can do some fun embroidery for the center, or make a pieced block. I really want to use my embroidery machine more, so looked through my purchased designs from Embroidery Library, and found Silent Night Poinsettia sketch. I looked through my Aurifil 40wt threads to find 2 shades of green, 3 reds and a yellow, my favorites to use with embroidery. Next step is to pick fabric. I had Buttermilk, a neutral, that I wanted for the background, and looked through my Stash Builders rolls for 2 the same red, and green. I was able to find 2 of the green with gold pine branches, and ended up using red from a half yard bundle Island Batik includes in the Ambassador boxes. I have quite a bit. It's so much fun to be an Ambassador!
So, after adding some iron-on featherweight interfacing on the fabric, and loading a tear away stabilizer, I started stitching the design.
I did enlarge this design, it's as big as the hoop would allow.
Next step is making the half square triangle units for the borders. I love making mine a little larger and trimming with the Quilt in a Day ruler. With the unit folded, you only have to trim 2 edges when you put the ruler line on the seam line. Then you trim the "dog ears" (those little triangles to the left) and press the unit open. Other tools have you press open first and trim 4 edges.
Next step is joining the units in the pattern. And pressing them all on the wool mat and using a clapper to help them lay flat. My friend, Jeremy of Dietrick Woodworking made me 2 custom clappers, and they are perfect. I love that he added purple resin on them, and they are smooth, and heavier than standard, so my blocks are flat! Aurifil 50wt thread helps with that, as well. I have a large cone I use for piecing, and always a Schmetz needle, usually size 12 Micron.
Chain piecing! I love it because it saves me time, and I can check the units before I sew them as a larger square to make sure the design layout is correct.
I took a photo with a flashlight to show E, to make sure she wants this. Yup, she loved it! But then again, I know her tastes, I've known her since I was about 7. lol.
I used more Buttermilk for the backing, and had a scrap of Warm & Natural batting the right size, so I loaded it on my Handi-Quilter Amara with Pro-Stitcher, picked the Holly Days Poinsettia panto from Intelligent Quilting, and picked Aurifil 40-three in 2026 for the stitching. I I went right over the whole top, including the embroidery. The thread is light enough that it barely shows on the embroidery, so it doesn't detract from that design.
Next step is trimming the extra backing and batting, and adding the binding. I had another 1/2 yard piece of a nice dark green, so used that. The corners are mitered! I also added my label on the back, and hand stitched the binding to the back. I usually do that by machine, but this looked better.
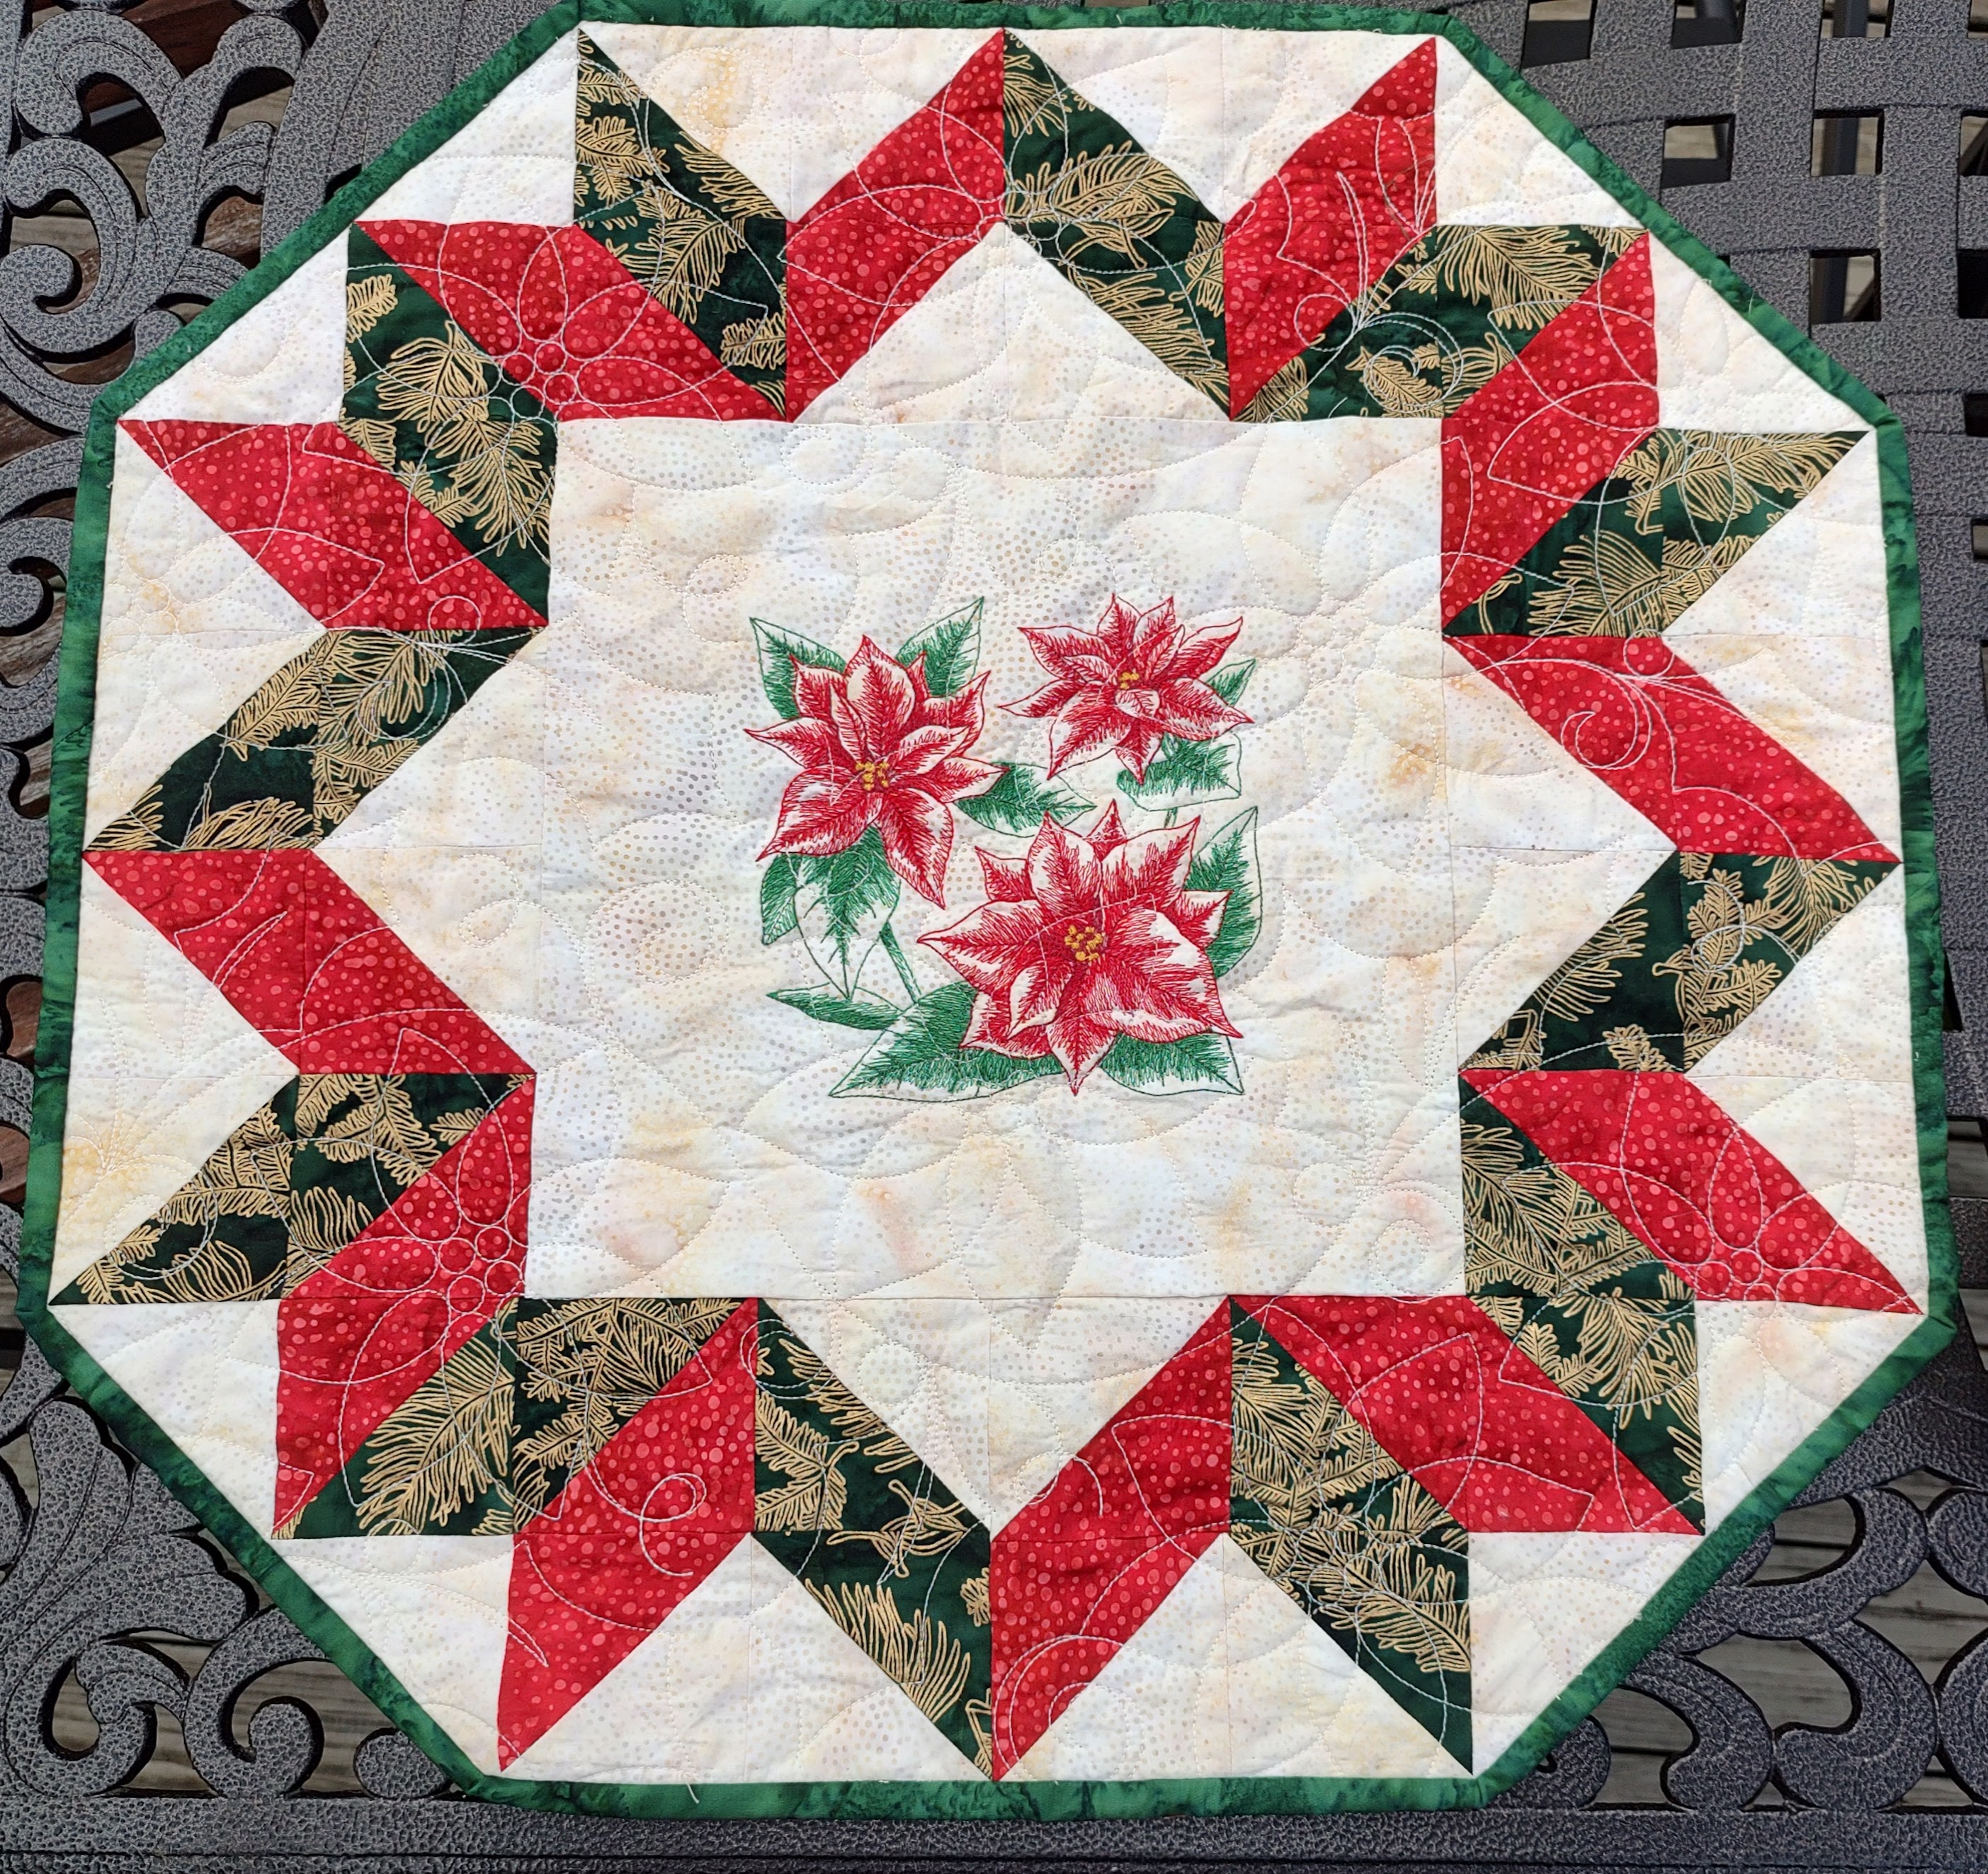
Here are the finished photos.
Ta Dah! A finished project for E. Next step is to mail it to Colorado, and work on the Autumn one, or the other idea I have, after finishing up a few customer projects.
Please see the other Ambassadors for more inspiration!
Before you go, I wanted to share the photos of the Divide and Conquer By Annie bag I finished last month. I was not finished by my day on the hop, but didn't get a chance to update my blog. It's awesome, and I love the fabric. This will come in handy for quilting classes. It holds supplies, fabric, and more. Heather wants it for her toys and supplies, though. PS, if you try this bag, there's a lot of bulk along the bottom seams. I used a denim needle and my walking foot, and the Janome 9450 went right through it all, as I made sure I went slowly. No needles broken.
Thanks for stopping by! I hope to have more to share this month. Happy Holidays!