Welcome to the Final Day of the All Puffed Up Blog Hop!
As an Island Batik Ambassador for my 10th year (still excited), the blog hop challenges have become more interesting. I never know what Natasha and Elizabeth might suggest, but a Puff or Biscuit quilt was not really on my bucket list (as many of the Ambassadors have claimed over the last 3 weeks).
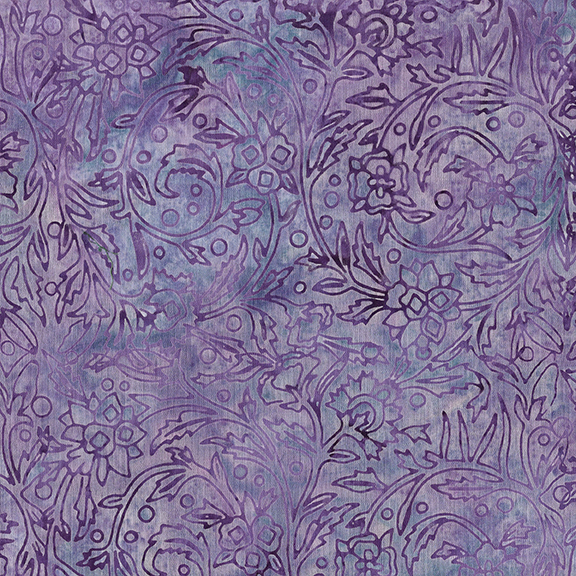
But the challenges make us grow as designers and quilters, and give your brain something to think about. I was given the Royal Crown collection to use in this project, as well as Hobb's Poly Down batting, Aurifil Thread, and Schmetz Needles in my roll as ambassador. The Royal Crown collection is so pretty! I know I've said that before, but this one had some gorgeous tjaps. I'm in awe of Kathy Engle's designs, as this is a signature collection for Heidi Pridemore of the Whimsical Workshop.
The shades of green, purple, cobalt and aqua are so pretty together, and the tjaps (chops) feature a variety of elegant scrolls, Fleur de Lis, flowers, and more. Normally tjaps have a wider copper area for the designs, but there's one in this collection that's so thin, delicate, and detailed that it's just stunning.
Isn't this unusual for a batik? It comes in a light blue with darker cobalt lines, as well. I loved so many of these tjaps this time. The Fleur de Lis would also be great for a binding, creating a unique striped design. They all are so pretty. I know I've said "favorite collection" before, but how can you not love this?
In addition to the 1/2 yard bundle, I also got a 2 yard piece of green from the collection, and 2 yards of Wheat. I used the green for binding.
Traditionally, a biscuit or puff quilt is made with squares. One square, cut larger than the muslin or backing square, is pleated on 3 sides, joined to a row of squares, and then stuffed. As the rows are joined, the opening for stuffing gets closed (and pleated), and after the top is done, the batting and backing are added, and the quilt is often tied with floss to keep the 3 layers together. There are many patterns and YouTube videos for this. But I had also seen former Ambassador Laura Piland's video of her making one on her long arm quilting machine. She layered a flat top and quilted it with a orange peel design, and stuffed the squares as she went. I wanted to see if I could do the same, but with a pleated top. So, the idea has formed, but not the actual design for the top. I knew I wanted to showcase the fabrics, since they are so pretty, and didn't want to just use squares. I decided to try a brick design, and found an idea on EQ8 that was similar. I uploaded the fabrics to give me an idea of color placement. When I changed the size and colors on the mock up, I thought it would look good.
I used this as a guide to sew the rows together. I cut each fabric into 4 1/2" strips and subcut that to 8 1/2" rectangles.
A Pile of Pretties!
I decided to sew the rows together with a pleat/tuck as I sewed. I actually tucked them together and did a quick backstitch over the tuck. I used Aurifil thread 50wt for this, like I do for all my piecing and a Schmetz Microtec 12 needle.
Sewing the rows together, I did the same. I offset the second row (actually I kept the initial block longer so I would make sure I had enough at the end to extend, as well.) I was going to cut partial blocks for the even rows, but ended up trimming the edges even once the top was pieced. Most of the even rows, the tuck lined up with the seam from the row before. If it didn't I was okay with that.
I decided to sew 2 rows and then add them to the top as I went. It was a way I could keep it sort of organized. There's no backing on these, just pleated rectangles sewn together.
Once I had something that measures about 56 by 52 (yes, normally my quilts are longer than wider, but...) I figured it would be a good size, and I know I showcased all of the 20 fabrics in the collection. Do I have a lot of rectangles left?? Yes, I do. I'll probably make a similar top but flat, for a charity quilt. I then trimmed the sides even, and stitched pleats in the outside block edges, around the whole top.
Now on to my Handi-Quilter Amara with Prostitcher.
My next step was to load a backing fabric (I used an end of bolt wide back that was the right size) and added a double layer of Hobb's PolyDown batting to help the puffy-ness along. I used Aurifil's polyester long arm thread in a variegated green for quilting. I wanted it to not break, and it's a fine thread that would also not be too showy on the top. Once the top was loaded, floating, on my long arm, I started stitching. I basted the top edge to keep it straight, and then stitched the first row of blocks. I started at the bottom of the row, on the left edge, went back to the top, and along the top edge, then to the seam for the second brick, down to the second row, back up the seam, and across the top edge to the next brick seam. I continued like this across the row, then grabbed some Poly-Fil to stuff the puffs in the first row. I used my Sure Foot, ruler base and a Ditch ruler to help hold down the layers so I could get a fairly straight line. I had a friend video me doing one of the rows.
I knew the puffs would add to the width of the take up pole, which is why I did not want to do a big and overly long quilt. I was hoping the finished quilt would be bigger, but it shrinks as you add the Poly-Fil. It now measures about 50" wide by 44" long.
I used scissors to trim the backing and batting (the ruler would not lay flat enough to use a rotary cutter) and added my standard 2 1/2" machine sewn front and back binding. The walking foot and Aurifil 40wt really helped in this step.
I love the texture in this photo. Looks like little mountains!
It was raining and hailing as I finished the top, but Heather was happy to model it for me in the house. It's so much prettier in person.
Island Batik is giving away a bundle of fabric. Please follow the link to enter to win.
And if you haven't already folowed my Youtube challen, Instagram and Facebook business page, please do. I'll choose someone who comments on this post by March 3rd to win some of the fabrics I have left from this collection. If outside the US, please be willing to cover the additional shipping charge and I'll make sure I stuff the flat rate envelope full.
Please check out the other Ambassador posts for this challenge. Some have additional give-aways, and all have inspiration and gorgeous collections that are shipping to stores now. Some stores that currently have the collection are:
Creekside Quilts (OR)
Hancocks of Paducah (KY) Stitchin Heaven (TX) Castle Sewing Centre- CANADA BC JellyRollFabric.Net (IN)
If you wish to get precuts, please let me know, and I'll order them. My Etsy shop link is on the right, and I'm happy to help you find gorgeous Island Batik fabrics.
Thanks so much for taking the time to join us on the hop! I hope you've found something to inspire you, and have picked out a collection for your next project or to add to your stash.